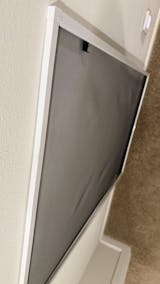
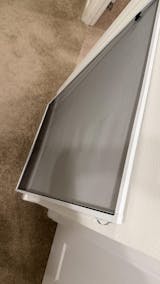
How to Build Your Own Window Screen: Essential Components and Tips
If you’re looking for an affordable and rewarding DIY project, building your own window screens is a great option. Whether you’re replacing old, damaged screens or adding screens to windows that don’t have them, this guide will walk you through everything you need to know. We’ll explore the components required to create window screens, provide step-by-step instructions, and ensure you have the right tools to complete the job. Let's dive into how to make replacement window screens and keep your home bug-free while maintaining airflow and visibility.
Why Build Your Own Window Screens?
Window screens are essential for keeping insects out, allowing fresh air to flow in, and reducing glare from the sun. Over time, screens can become damaged from weather, pets, or regular wear and tear. Instead of buying pre-made replacement window screens that may not fit perfectly, building your own allows you to customize the size, material, and fit of the screen for your specific window screen frames.
Not only is this a cost-effective solution, but you’ll also have control over the quality and durability of the materials, ensuring your new screens last for years to come.
Key Components for Building Window Screens
Before starting your project, you’ll need to gather the right components for creating screens for windows. Here’s a breakdown of the essential materials you’ll need:
-
Screen Frame
- The frame forms the structure of your window screen. Frames for screen windows are typically made of aluminum, which is lightweight, durable, and resistant to rust. When building a screen, you can purchase frame kits or individual frame pieces that you cut to size for a custom fit.
- Frames come in various colors, so you can match them to your existing window trim. Ensure you have the correct measurements for each window to avoid issues when assembling your frame.
-
Screen Mesh
- The mesh is the most important part of your window screen. It keeps insects out while allowing airflow. The most common types of screen mesh are fiberglass, aluminum, and pet-resistant mesh.
- Fiberglass Mesh: This is the most popular option for window screens because it is affordable, flexible, and easy to install. Fiberglass screens are resistant to corrosion and offer good visibility.
- Aluminum Mesh: More durable than fiberglass, aluminum mesh is stronger and ideal for areas with pets or heavy wear. However, it is more prone to denting.
- Pet-Resistant Mesh: Made from a thicker material, this mesh is ideal for homes with pets that tend to claw at the screen. It offers extra durability but may slightly reduce airflow compared to standard mesh.
- The mesh is the most important part of your window screen. It keeps insects out while allowing airflow. The most common types of screen mesh are fiberglass, aluminum, and pet-resistant mesh.
-
Spline
- The spline is a rubber or foam cord that holds the screen mesh securely in the frame. It comes in various diameters, and you’ll need to choose the correct size to match the groove of your window screen frame. For replacement window screens, ensure the spline you choose fits snugly in the existing frame.
-
Screen Corners and Tension Springs
- When assembling window screen frames, corners and tension springs hold the frame pieces together and provide structure. Most replacement window screen frame kits include these components, but if you’re building from scratch, make sure to purchase the correct corner connectors for your frame type.
-
Pull Tabs
- Pull tabs make it easier to remove the screen from the window frame for cleaning or replacement. These are optional but a handy addition for screens replacement projects.
-
Screen Spline Roller
- A screen spline roller is a must-have tool for any window screen DIY project. It helps press the spline into the groove, securing the screen mesh in place without damaging it.
Step-by-Step Guide to Building Your Own Window Screen
Once you have all the necessary components, it’s time to assemble your window screen. Follow these steps to build your own replacement window screens:
1. Measure Your Window Frame
The first step in creating window screens is to measure the inside dimensions of your window frame. Measure both the width and height of the window opening to ensure a snug fit for the screen. Use these measurements to cut your screen frame pieces to size.
2. Cut the Screen Frame
Using a hacksaw or miter saw, cut the aluminum frame pieces to the correct length, accounting for the corners where the frame pieces will join. Most frames for screen windows are easy to cut and assemble.
3. Assemble the Frame
Once your frame pieces are cut, connect them using the corner connectors or tension springs. Make sure the frame is square by measuring diagonally from corner to corner. Both measurements should be the same to ensure your frame is not lopsided.
4. Lay the Screen Mesh
Roll out the screen mesh over the assembled frame, ensuring that it extends about an inch beyond the edges of the frame on all sides. Keeping the mesh taut is crucial to prevent sagging once the spline is inserted.
5. Install the Spline
Using the spline roller tool, press the spline into the groove of the window screen frame, starting at one corner. Work your way around the frame, pressing the spline in firmly but not overstretching it. The screen mesh should be tight without distorting.
6. Trim Excess Mesh
Once the spline is in place and the mesh is secure, use a utility knife to carefully trim off the excess screen material around the frame. Be sure to cut close to the spline without cutting into it.
7. Install Pull Tabs (Optional)
If you're using pull tabs for easier screen removal, install them during the spline insertion process, tucking them under the spline at the appropriate locations.
Final Steps: Installing Your Replacement Window Screens
Once you've assembled your new replacement window screens, it's time to install them in your windows. Simply pop the new screen into the window frame, ensuring it fits securely. If you've built multiple window screens for your home, repeat the installation process for each window.
Why Build Your Own Window Screens?
Building your own replacement window screens is a simple and satisfying DIY project that can save you money while ensuring a perfect fit for your windows. You’ll have control over the materials, design, and quality, giving you durable, custom-made window screens that will last for years to come.
At Shade Screen Solutions, we offer all the components you need to build your own screens for windows, including custom-sized frames, high-quality screen mesh, spline, and more. Whether you’re replacing worn-out window screens or upgrading to a more durable option, we’ve got you covered.
Conclusion
By following this guide, you’ll be able to build your own custom window screens that are both functional and durable. With the right tools, high-quality materials, and a little patience, you’ll create replacement window screens that fit perfectly and enhance the comfort and airflow in your home.
For premium window screen materials, custom sizing, and expert advice, visit Shade Screen Solutions today!


