


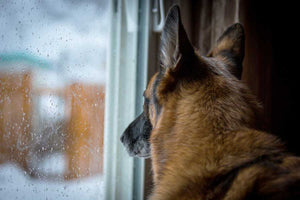
Do your pets like to play outside? Do they enjoy staring out the window? Lots of pets do! With warmer weather, you probably want to be spending more time outside too. At the very least, your sliding glass door is perhaps propped open.
Your pets will take that opportunity and run with it. Whether your dog is trying to go after a chipmunk or your cat wants to escape and explore, pets are hard on most window and door screens. A regular screen can break or tear when your pet tries (and succeeds) to escape. So, what can you do? Are you supposed to keep your windows shut in gorgeous spring weather?
No! You can make your own pet-proof screen panel to keep your furry family members safe inside.
It’s simple, it’s quick, and the materials are things you probably have at home. Here’s how to make your own homemade pet-proof screen in less than an hour.
Materials that you’ll need:
- Sewing needle and thread (if you don’t have thread, dental floss works)
- A wire shelf – ideally 20” wide or more, with a 1” lip or less
- A roll of pet window-screen material
Step One
First, measure your sliding door height. Your shelf should ideally be about an inch shorter than the height of your sliding door. If you don’t have a wire shelf just hanging around, you can find one at most hardware stores.
If the shelf is too long, you can have the hardware store cut it to the right length for you. You can also trim it yourself if you feel confident with some wire snips.
The “depth” of the shelf is going to be the width of your new screen. The deeper the shelf, the wider you’ll be able to slide your glass door. Twenty inches is generally the deepest you can find, but more is better!
Note: if you have a screen door along with the sliding glass door, you can stop here and skip right to installation. The screen material is just to keep out bugs. If you have something to take care of that, you can use the wire shelving on its own. It’s an instant pet-proof panel without any extra work!
Step Two
Once you have your wire shelf home, you can measure out the window screen material. The screen material should be the same width as the shelf and about an inch and a half taller than the shelf.
The simplest way to do this is to roll out some screen material and put the shelf on top of it. Then you can just trim the screen around the shelf. Remember to leave an extra inch and a half of material at the top of the shelf. This will help keep bugs out later.
Step Three
Now you’re going to align the screen.
The shelf is lying on the floor with the screen underneath it. If necessary, flip it over so that the lip of the shelf is facing up.
Then, double-check which way your sliding door opens. If your door slides to the left, the lip should also face left. If it slides to the right, the lip should be on the right. This affects how the new screen panel will fit in your door, so be careful to pay attention.
Once you’re sure you know which way is up, take the screen and put it on top of the shelf. Line up all your edges and remember to leave an inch and a half extra on top. This is what your screen panel will look like once you have it in your door, so make sure it looks okay.
Step Four
Once you’ve got everything lined up, it’s time to secure the screen to the wire. This is the easiest sewing job you’ll ever do! All you need to do is thread the needle and then slide it through the screen at points around the edge.
For example, at each corner, thread the needle then pierce the screen. Run the needle under the wire, then bring it back up the other side. Once you have some thread that wraps around the wire and part of the screen, tie it off tight. That leaves your screen securely connected to the wireframe.
The corners are important, but you should make sure to include many points along the sides. The more places you secure the screen, the less likely you are to face bugs where you don’t want them.
You should also choose some points in the middle of the screen. That keeps the screen from bulging in the wind or tempting cats to attack. Again, the more connection points you make, the more secure it will be.
Pet-Proof Screen Installation
So, the screen panel is now finished. It’s time to actually install it.
Slide your patio door open a few inches wide than the screen panel. Put the lip against the doorframe itself, and face the other edge toward the door. If you can, try to rest the panel in the sliding door track on the floor. Then slide the door, so it’s holding the screen panel in place.
You’ll notice that the screen material at the top brushes the overhead doorframe. That keeps bugs out. The wire is shorter to allow you to lift the screen panel up and out more easily when you’re moving it.
With this setup, the lip is snug against the flat door frame, and the narrow side should fit in the lock of the sliding door. With the base resting in the track, you have a firmly secured screen panel. It should be able to stand up to a cat or dog, launching themselves at anything small and furry outside.
Now you’re all set to enjoy warm breezes without worrying about your pet escaping. This panel is reusable and fits in just about every sliding door mechanism, so you can even bring it with you if you move.